


Start with the step that puts the most stress on the tube
A 1.5ml micro-centrifuge tube looks simple until it starts affecting your results. In PCR work, poor resin quality or a weak cap can show up as inconsistent amplification, evaporation loss, or contamination risk. During storage, clarity and sealing matter more than people expect. In spin steps, the wrong tube can crack, deform, or leave you second-guessing whether the pellet is still where it should be.
The practical way to choose a 1.5ml micro-centrifuge tube is not to ask for the “best” tube in general. Match the tube to the harshest part of your workflow. If the same tube has to handle thermal cycling, freezer storage, and repeated centrifugation, your screening standard needs to be tighter from the start.
Check resin purity before you think about price
For PCR and other sensitive molecular workflows, material purity is the first filter. A cheap tube that looks fine on the bench may still introduce trouble if additives, residual contaminants, or inconsistent molding interfere with enzymes or low-volume reactions.
What to check:
- Whether the tube is positioned for molecular biology or general sample handling
- Whether the supplier provides a clear product description for PCR use
- Whether lot-to-lot consistency is documented in the product information you receive
A common mistake is treating all polypropylene tubes as equal. They are not. If you run PCR, especially with low-template samples or tight repeatability requirements, start with tubes explicitly intended for that kind of work. If your application is routine sample transfer or temporary holding before downstream processing, the threshold may be different.
Look at the cap as a performance feature, not just a closure
Operators usually notice cap quality only after something goes wrong: evaporation after heating, leakage during mixing, or popped lids after centrifugation. Cap design directly affects sample security.
A workable check is simple. Open and close a few tubes from the same bag or rack. The hinge should move cleanly without whitening or stressing too early. The lid should close with consistent force, not feel loose on one tube and overly stiff on the next. When you press it shut, it should seat fully without requiring awkward extra pressure that slows bench work.
For heated steps, poor sealing shows up fast. If your workflow includes incubation, thermal cycling preparation, or warm holds, choose a tube with reliable closure performance rather than focusing only on nominal volume.
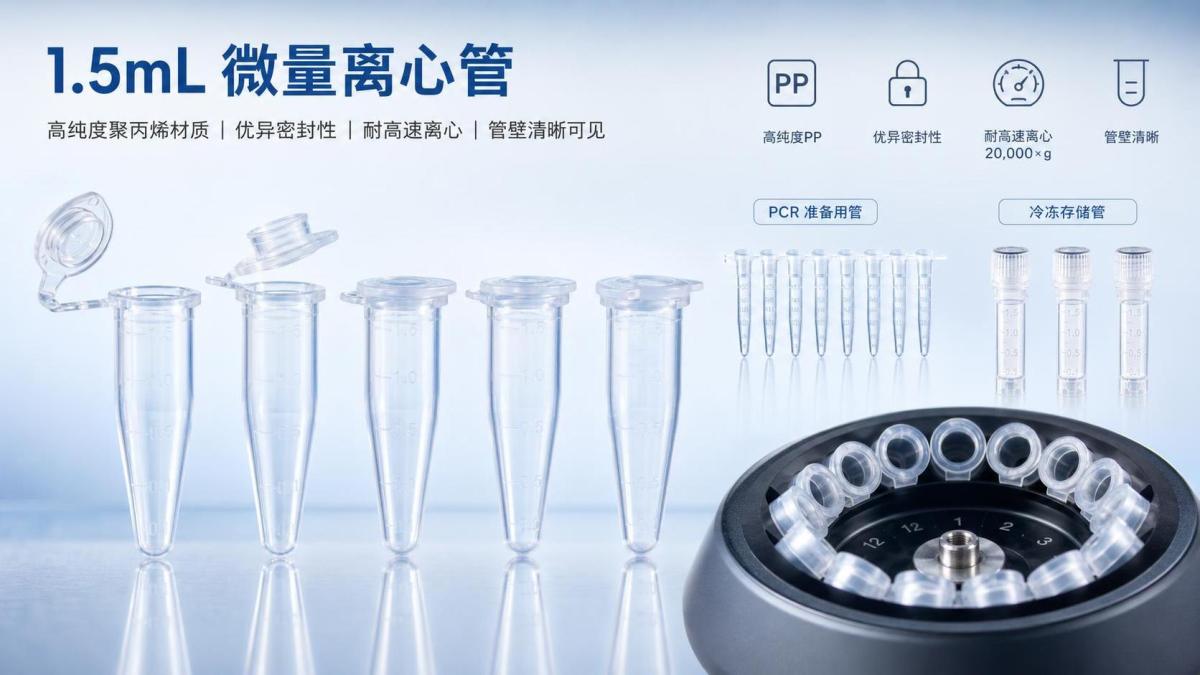
For spin steps, ask one question first: what force will the tube actually see?
Not every 1.5ml micro-centrifuge tube is suitable for the same centrifugation load. The right choice depends on your rotor, run conditions, temperature, and whether the sample will be spun once or repeatedly throughout the day.
Before ordering, verify the tube’s rated centrifugation suitability in the product specification supplied by the manufacturer or distributor. Do not rely on appearance. Two tubes can look nearly identical and perform very differently under force.
If you use refrigerated centrifugation or move tubes directly from cold storage into a spin step, the material has to tolerate both conditions together. That combination is where marginal tubes tend to fail.
Do not overlook tube clarity
Clarity sounds minor until you are checking a tiny pellet, confirming whether liquid is still on the wall, or trying to avoid disturbing layered material. A cloudy tube slows routine work and increases handling errors.
For operators, the benefit is practical: clearer walls make it easier to judge fill volume, see bubbles, identify residue after decanting, and confirm whether the pellet has shifted. If your lab frequently works with low sample volumes, transparency is not cosmetic. It affects decisions at the bench.
Match the tube to your storage conditions, not just your reaction volume
A 1.5ml micro-centrifuge tube chosen for short bench use may not be ideal for longer storage. Think about how long samples stay inside, whether they go through freeze-thaw cycles, and whether tubes are stored upright, boxed tightly, or handled in batches.
Check these points before standardizing:
- Cap seal stability after cold storage
- Whether labels stay readable on the tube surface you use
- Whether the tube body remains easy to open after freezing
- Whether repeated handling causes hinge fatigue
If the sample is valuable or hard to replace, do not judge storage suitability from a single day’s use. Run a small internal check using your actual storage time and retrieval pattern.
Pay attention to fit with your existing workflow
Tube selection gets easier when you stop viewing it as an isolated purchase. Ask how it behaves with your racks, pipettes, centrifuge adapters, and labeling routine. A technically acceptable tube can still create friction if it sits poorly in the rotor, is awkward to open one-handed, or does not present liquid clearly during aspiration.
The same logic applies across other consumables and bench tools. In slide staining work, for example, compatibility matters just as much as material choice. Something like Staning Jar&Rack is judged not only by its glass or stainless steel construction, but by whether it fits standard slide dimensions used in routine handling. Tube selection works the same way: the item has to fit the real workflow, not just the catalog line.
Screen for packaging and lot consistency before scaling up
Operators often discover quality variation only after moving from evaluation samples to a full purchase. That is where packaging format and lot consistency become operational issues, not procurement details.
A short incoming checklist helps:
- Compare closure feel across several tubes from different parts of the package.
- Inspect molded edges, base symmetry, and obvious visual defects.
- Test a few tubes in the actual centrifuge and temperature conditions you use most.
- Run a small PCR batch if molecular performance is part of the requirement.
- Keep the lot information tied to your internal trial result before approving repeat orders.
This does not need to become a heavy qualification project. A focused bench trial usually reveals the issues that matter most.
Know when a general-purpose tube is enough
Not every task requires a premium tube. For temporary aliquoting, noncritical transfer, or short, low-stress handling, a general-use 1.5ml micro-centrifuge tube may be perfectly reasonable. The mistake is using that same standard for PCR setup, archived samples, or repeated high-speed spins without checking whether the tube was meant for those conditions.
A good buying decision usually comes from separating your use cases into at least two groups: critical molecular work and routine handling. That alone prevents a lot of overspending in one area and underperformance in another.
Use this decision order at the bench
When you need to choose quickly, keep the order practical. Start with application fit: PCR, storage, spin, or mixed use. Then check resin suitability, cap seal performance, centrifugation tolerance, and clarity. After that, confirm the tube behaves well in your own racks, rotors, and handling routine.
If one tube must cover all three uses, reject any option that is only strong in one area. The right 1.5ml micro-centrifuge tube is the one that stays dependable across repeated daily handling, not the one that merely looks acceptable when it is empty and unused.
Related Posts
Online Message
PROFESSIONAL CONSULTATION
If you are interested in our products and want to know more details, please leave a message here, we will reply you as soon as we can.