


When to dilute samples for quick cell counting with hemacytometers
Crowded counting grids, overlapping cells, and uneven distribution can turn a quick count into an unreliable result. Knowing when to dilute your sample helps you use Hemacytometers for quick cell counting more effectively without adding unnecessary preparation steps. For laboratory operators, the goal is a well-mixed suspension with enough clearly distinguishable cells to count confidently—not simply the lowest possible concentration. This guide explains how to recognize samples that need dilution, choose an appropriate dilution factor, and account for it when calculating the original cell concentration, helping you balance speed with dependable results.
Dilute when crowding prevents a defensible count
The most useful dilution trigger is what you see in the counting area. If individual cells overlap so often that you repeatedly lose your place, or cannot decide whether a boundary contains one cell or several, the suspension is too crowded for that counting method. Continuing usually saves less time than preparing another dilution.
There is no single concentration limit that suits every sample. Large mammalian cells become visually crowded at a different concentration from small yeast cells. Chamber geometry, microscope optics, staining, and the counting area specified by your procedure also affect the decision. A concentration range validated for one application should not automatically become the rule for another.
Before committing to a full count, scan the loaded chamber. Look at cell separation, distribution across the grid, and whether the selected squares contain enough cells to support the required precision. If the suspension is uniformly dense and individual cells are difficult to distinguish, dilution is appropriate. If one region is crowded while another is nearly empty, investigate mixing and loading first.
Not every difficult grid needs more diluent
Dilution reduces the number of cells per unit volume. It does not necessarily separate aggregates, correct an improperly seated coverslip, or remove bubbles. These problems can produce a misleading count even when the apparent density looks comfortable.
- Uniform crowding: dilute, mix again, and reload according to the chamber instructions.
- Clusters surrounded by empty space: review the sample preparation or dissociation method. Do not assume dilution will turn clusters into individual cells.
- A strong density gradient: check for settling in the preparation vessel, delayed loading, tilted handling, or incorrect chamber filling.
- Bubbles, overflow, or liquid entering unintended channels: prepare a fresh chamber load rather than calculating from the affected area.
- Very few cells throughout: avoid further dilution. Count a larger validated area or use a suitable alternative method.
For aggregates, use only a dispersal approach compatible with the cell type and laboratory procedure. Aggressive pipetting may damage fragile cells; chemical dissociation may change viability or downstream behavior. If clusters remain, record that limitation rather than silently treating each cluster as one cell.
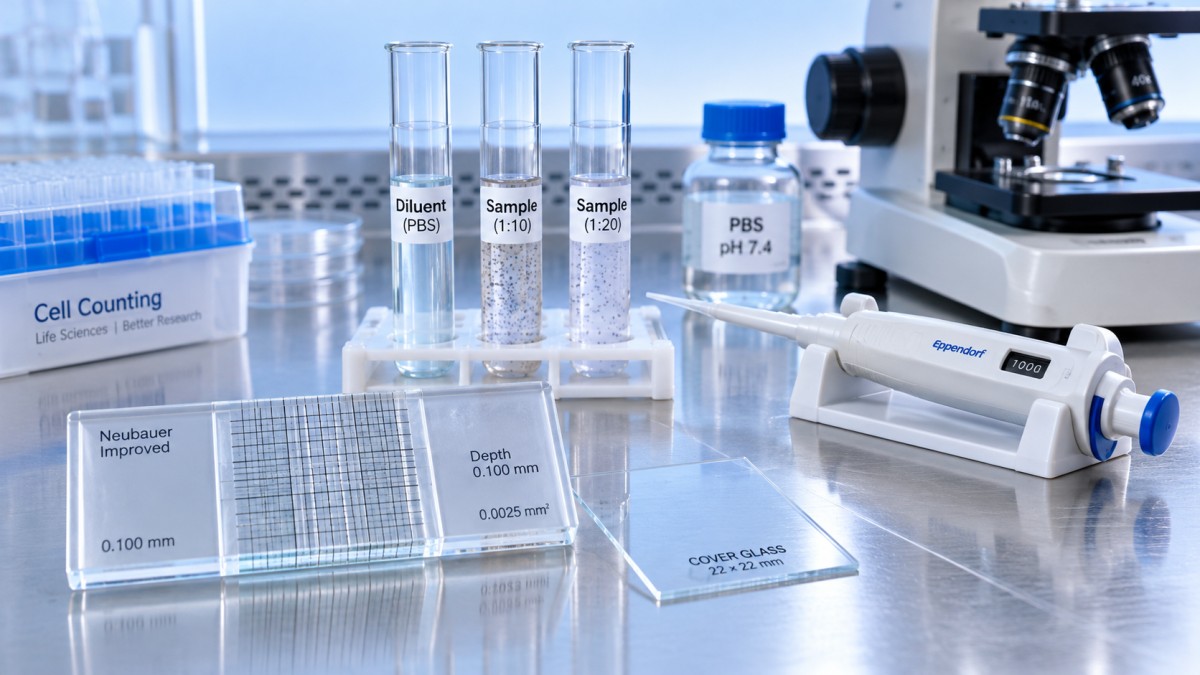
Choose the smallest useful dilution
A useful dilution leaves clearly separated cells without making the chamber so sparse that you must search numerous squares. Start from a previous count when one is available. If the expected concentration is several times higher than the working concentration used in your validated procedure, that ratio gives a sensible starting dilution factor.
Without a previous result, make a small pilot dilution and inspect it before preparing a larger volume. For a mildly crowded sample, a twofold dilution may be enough. A much denser suspension may need a greater factor. These are preparation options, not universal acceptance limits; the loaded grid still determines whether the choice is useful.
Dilution factor = final mixture volume ÷ original sample volume. Mixing 100 µL of sample with 100 µL of diluent produces a factor of 2. Mixing 100 µL of sample with 400 µL of diluent produces a factor of 5. Write both volumes down rather than relying on ambiguous shorthand such as “1:5.”
Choose volumes that your pipettes can deliver reliably. A direct dilution is often simpler than several sequential steps, provided the sample aliquot is large enough for accurate pipetting and the mixture fits the vessel. Serial dilution may be necessary for very concentrated suspensions, but each transfer adds another opportunity for incomplete mixing or volume error.
The diluent matters as much as the ratio. Use a medium or buffer compatible with the cells and the counting method. For live-cell counting, inappropriate osmolarity or pH can alter cell integrity during preparation. Water is not a default diluent for mammalian cells, and compatibility should not be inferred simply because a liquid looks clear.
Include staining in the total dilution
If your procedure uses a viability dye, its volume contributes to the dilution. An equal-volume mixture of cell suspension and stain introduces an additional factor of 2. Follow the validated staining ratio and timing for your application; changing either can affect how viable and nonviable cells are distinguished.
For sequential preparation, multiply the factors. A fivefold sample dilution followed by equal-volume staining gives a total dilution factor of 10. Conversely, if you calculate the final volume directly relative to the original sample volume, do not multiply by the staining factor again. That would count the same dilution twice.
Mixing and vessel choice influence the result before loading
Cells can settle between dilution and sampling. Mix the original suspension immediately before withdrawing an aliquot, mix the diluted preparation, and sample it promptly. Use gentle pipetting or another approved method appropriate to the cells. Avoid foam, which makes accurate volume transfer and chamber filling harder.
The preparation vessel should provide enough room for mixing while allowing reliable recovery of the required aliquot. A borosilicate Disposable Glass Test Tube is an option for general mixing and simple laboratory work, including workflows involving samples susceptible to pH changes. The supplied range includes sizes from Φ10 × 50 mm to Φ16 × 100 mm, so vessel selection should reflect the working volume and pipette access.
The product specification states compliance with ASTM E 890 for disposable glass culture tubes and suitability for moderate heating, such as in a water bath. Neither statement establishes sterility, cell recovery, or suitability for every live-cell assay. Confirm those requirements separately, and do not heat a counting sample unless the procedure requires it. For adhesion-prone cells, assess whether the vessel surface affects recovery.
Load the hemacytometer using its specified coverslip and filling method. Underfilling, overfilling, or an incorrectly positioned coverslip can compromise the assumed chamber volume. Allow cells to settle as directed, keep the chamber level, and apply the same boundary-counting rule throughout—for example, including two designated edges and excluding the opposite two when that matches the laboratory procedure.
Calculate the original concentration from the volume actually counted
The general calculation is straightforward: divide the cells counted by the counted volume in milliliters, then multiply by the total dilution factor. The important detail is the chamber volume represented by your selected squares.
Original concentration (cells/mL) = cells counted ÷ counted volume (mL) × total dilution factor.
For an improved Neubauer chamber with a specified depth of 0.1 mm, a 1 mm² large square represents 0.1 µL, or 0.0001 mL. When counting those large squares, the average cells per square can therefore be multiplied by 10,000 and then by the dilution factor. Confirm your chamber geometry: the same multiplier does not automatically apply to smaller subdivisions or different chamber designs.
As a calculation example, suppose four such large squares contain 320 cells in total. Their combined volume is 0.0004 mL, giving 800,000 cells/mL in the counted preparation. With a total dilution factor of 10, the original suspension contains 8,000,000 cells/mL. This example illustrates the arithmetic, not a recommended target density.
For viability measurements, record viable and nonviable counts separately. Calculate viable concentration from the viable count and the same counted volume and dilution factor. Viability percentage is viable cells divided by total classified cells, multiplied by 100; the common dilution factor cancels from that percentage.
Know when to repeat instead of reporting
Compare replicate chamber loads or counting areas according to your laboratory’s acceptance criteria. A large discrepancy is a reason to investigate, not simply average away the difference. Remix and reload if settling or filling is suspected. Reprepare the dilution if the transferred volumes or total dilution factor are uncertain.
Overdilution creates a different problem: counting very few cells increases random sampling uncertainty. Under a simple independent-counting model, relative counting uncertainty scales approximately as 1 divided by the square root of the number counted. Real samples may have additional errors from clumping, mixing, and identification. Counting more validated area can help with sparse samples, but it cannot rescue a poorly prepared suspension.
Record the original sample identity, dilution volumes, staining step, chamber type, squares counted, raw counts, and any preparation problems. These details make a result reproducible and prevent a later operator from mistaking the diluted concentration for the original concentration.
In our medical-device export work with institutions, laboratories, and distributors across dozens of countries and regions, quality, clear documentation, and practical service guide consumable selection. For this workflow, that means checking chamber specifications, preparation-vessel dimensions, and applicable product documentation—not assuming that similarly named supplies are interchangeable.
The decision to dilute should remain simple: dilute a uniformly crowded suspension, troubleshoot an uneven one, and avoid further dilution of a sparse one. Before reporting, confirm that the cells were distinguishable, the counted volume was correct, and every preparation step is represented in the total dilution factor.
Related Posts
Online Message
PROFESSIONAL CONSULTATION
If you are interested in our products and want to know more details, please leave a message here, we will reply you as soon as we can.